trial and error(s)

I’ve learned a few lessons yesterday. When modifying a pattern to redesign it in to something else, do not think adding new finishing techniques will automatically work out.

I sewed my jacket wool edge to my acetate lining edge. I thought the two were an equal length. Only after carefully edge stitching the entire length with ribbon did I discover they were not equal as particularly near the side seams the wool was being pulled upwards by the suddenly apparent shorter lining.

I unpicked the whole lot, and tried to rearrange the lining so that it didn’t cause pulling. No joy. Eventually had that light bulb moment of why am I doing this to myself, lets just stick with a free hanging lining like all the other jacket patterns I have made recommend.

But, how to salvage a now badly chewed up lining edge which was looking rather sorry for itself? well, I have added a ribbon finish to it as well! it now actually looks quite pretty and smart, and echoes the ribbon finish I added to the wool jacket.

So here it is…the final outfit! the beret is from Venice (where I am going again this Sunday!) and has been a firm favourite in my wardrobe ever since.

all ready to face the (very snowy) cold day!

all ready to face the (very snowy) cold day!

really proud of the fact the jacket perfectly lines up with the dress!

really proud of the fact the jacket perfectly lines up with the dress!

with the jacket open so you see the dress in more detail

with the jacket open so you see the dress in more detail

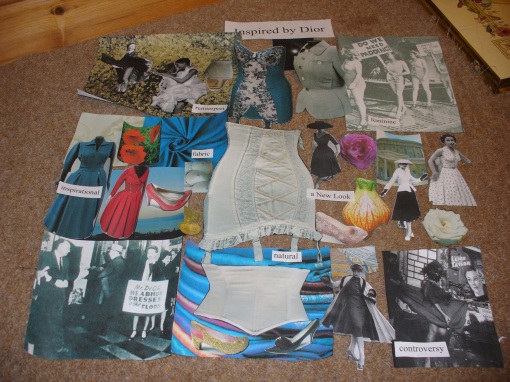
getting in the mood (board)

my latest production (line) thoughts. More details on the course note page.

I think I've now settled on "inspired by Dior" as it enables me to mainly focus on Dior, but also focus on other designers inspired BY him which broadens the field a bit

I think I’ve now settled on “inspired by Dior” as it enables me to mainly focus on Dior, but also focus on other designers inspired BY him which broadens the field a bit

seeing red – burning the midnight oil

early morning in Turkey, fortunately I saw some sleep before dawn both there and here!

early morning in Turkey, fortunately I saw some sleep before dawn both there and here!

So I had this nice idea of completing my sixties shift dress in time for a dinner with family on Sunday. Alas, my sewing finesse appeared to have had a siesta and I was left steadily ripping stitches out of the much less amenable to work with acetate lining.

I have ambivalent feelings towards this fabric as a lining. It is a step up from polyester (which I will not touch again ever in any of my own sewing projects!) and less pricey/delicate than silk. But compared to my forgiving wool it was a mule to work with, repeatedly kicking me to the kerb.

Well, suffice to stay instead of being sensible knowing I was working the next day guess where I was seated until past midnight? this was not helped by discovering attempting to take in the side seams at the under arm area would mess up my lovingly matched bodice seam junction. Repeated repositioning has resulted in a relatively matching impasse (cant face doing more!) and a difference of about 2mm, which I guess I can live with.

The dress is now done, bar slip stitching the lining shoulder seams. As I am actually currently wearing the dress (yes, it did get taken out to dinner AND has been out for two very comfy work days) this will have to wait a little longer.

The jacket is the next focus of my attention, and now needs the lining to be attached. Being half the size of the dress it should hopefully be a little quicker to complete, and I intend to show off some photos of the completed ensemble later this week….

colour block(ed)

May I not recommend planning and sewing a colour blocked pattern when tired. Despite my best attempts I failed (again!) to correctly ensure the lining colour blocking was cut out to ensure it matched with the dress. Thank goodness for easily reversible lining! Saved yet again.

Alas, my tired brain was not up to the challenge of remembering the lining is a reverse of the dress in terms of which way the seams go. Not normally a problem if you are using the same fabric colour for the whole thing. However, you cant just reverse things when colour blocking if you want it to match something else. Outcome? my stitch ripper and I had some more bonding time.

However, it is slowly coming together. Here’s what the back will look like. Two more darts to unpick of incorrect pieces and it will be full (iron) steam ahead with the attaching to the dress itself!

green and midnight blue colour blocking!

green and midnight blue colour blocking!

deja vu – but now with sleeves!

I know, you are going to look at this photo and think…looks just like the last one. Except its not! I have duplicated all of the bodice pieces, added the sleeve option (from the dress pattern) and created a matching jacket.

A few things still to do to it. The sleeves need hemming, I need to add the lining (might as well do all of that in one go with the dress) and the front bodice pieces need trimming to match the length of the back bodice pieces. I think I also need to straighten up the front closure, we’ll see. Its my first experience “creating” something different out of pattern pieces then what the envelope intended.

The jacket front wont overlap, that would be just too bulky. So I’m going to add buttons and loops as a closure. I’ve also hemmed the dress itself (with a baby hem, love that hemming foot!) and my machine made a nice neat job of it. I hemmed by hand the last shift dress and on close inspection (because of the thick weave of the fabric) you can see the stitches. So I didnt want to recreate that in my nice thick felt.

I must say, apart from the stretch factor this fabric is LOVELY to work with. Easing in the sleeves was a breeze.

Anyway, on to the pictures..(despite careful pressing I can see yet more is needed!)

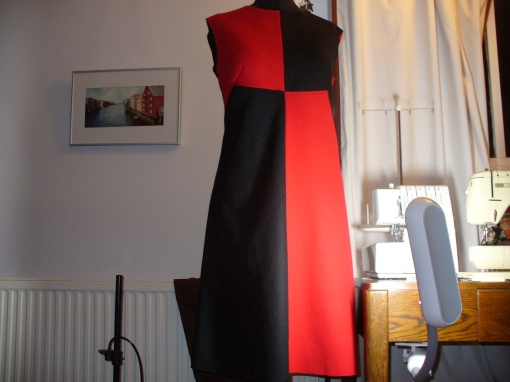
the front, can you spot the difference at the bodice darts where the jacket had been added?

the front, can you spot the difference at the bodice darts where the jacket had been added?

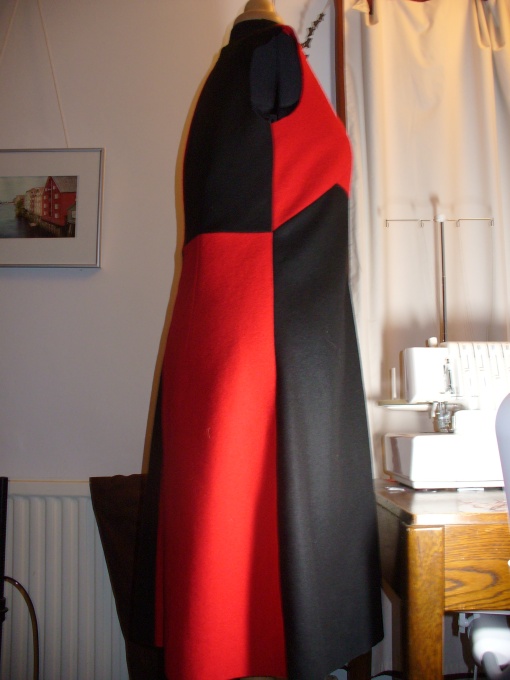
side profile, I love how the colour blocking changes round the sleeve head

side profile, I love how the colour blocking changes round the sleeve head

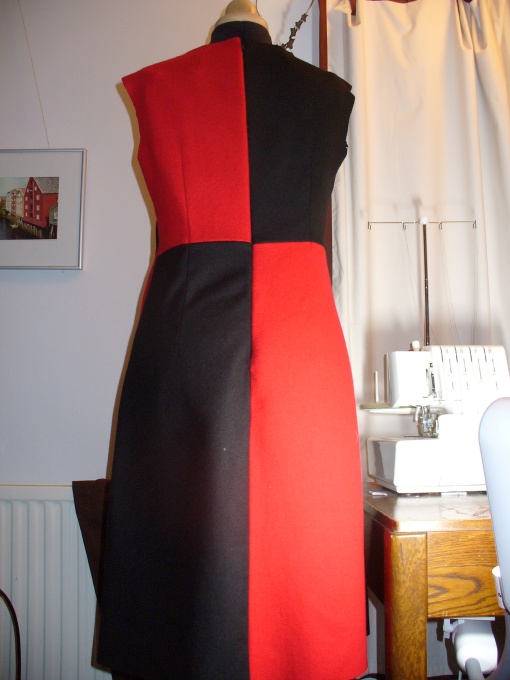
the back

the back

stretching my patience, but am still in love!

So, the latest update to the black and red sixties statement piece. I have made a frustrating discovery. Despite choosing what looked like similar fabric I was deceived!

In fact, they stretch at different rates. My first inkling of this was after I sewed my first seam. Despite careful pinning one side was about 1.5cm longer then the other. Every long seam there after attempted to mismatch. My stitch ripper saw lots of action before the seams finally matched up.

Such was my determination to see the final result I stayed up a bit later than I should have last night resolute in my desire to see the final result. It did not disappoint!

This still needs a lining, but you can really see what it’s going to be….

P1040020

P1040021

P1040022