of course: it is time to finish

one last corner.....

one last corner…..

Tomorrow the last of my coursework (after printer failure due to having exhausted all colour ink because of printing so much!) will be handed in to my tutor. It marks the end of a year of a pretty heavy schedule, which at times gave me bouts of mental indigestion. Its been a lot to take in and stomach. Its not always been comfortable, and at times rather bewildering.

My progression and understanding has been in fits and starts. But, I am glad to finally reach the end – because the last few months have been a little overly full. I’d love to have some more unstructured time back, and also time to sew for ME instead of The Course.

Plus it is summer, and I have spent a few too many weekends indoors studiously at work on outstanding coursework whilst missing going outside and enjoying it all. The last winter in the UK was horrid, and spring so late, I dont want to miss the summer. I’ve waited long enough for it!

I hope I get a good grade. But whatever it is, I’ve worked my socks off and I know the value of what I’ve done. That’s enough for me (but I would like to pass).
the last stitch and step

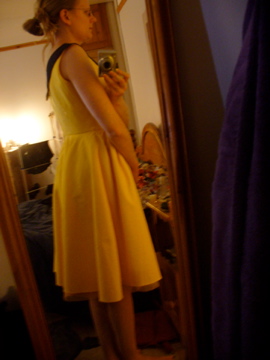
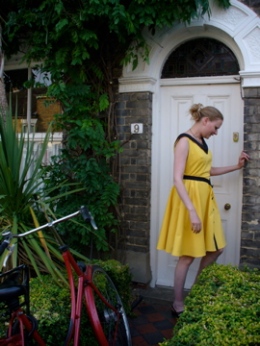
I wanted to wait until a sunny point in the day before taking some photos of the finished dress. It is such a cheerful colour it seemed a shame not to have it properly reflected in light and brightness.

The hemming (all nearly 4 meters of it) in the end was time consuming, but not as bad as I had feared. The horse hair braid actually made things easier once attached. The only annoying point, is despite my careful marking and cutting of the hem, one of the organza skirt pieces was shorter then planned, and is not quite as tucked away in the outer fashion fabric hem as its sister pieces.

The cost of this dress, both financially and time wise is pretty horrendous. I had to work it out for my course and it really depressed me. This is not an exercise I intend to repeat in the future! in short, this is the most expensive dress I have ever made. 

But, this is a celebratory post, so let me share the photos and enjoy the results.

ImageImageImageImageImageImageImage

pinching things in to shape

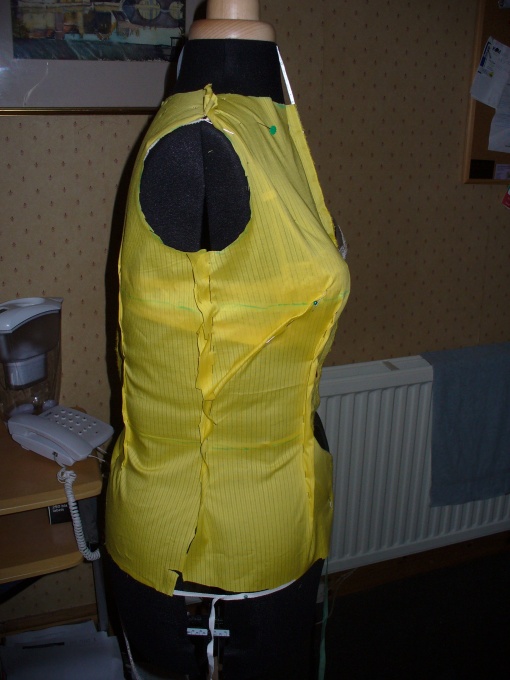
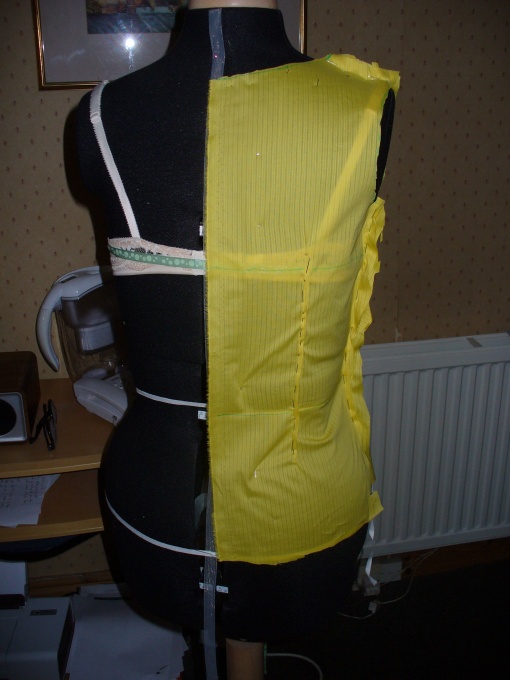
One of the last things (how nice to type those words) left to do for my course is draping a bodice on the stand. Bearing in mind the original class for this was a couple of months ago, and my memory (despite notes) is none too sharp it was always going to be interesting!

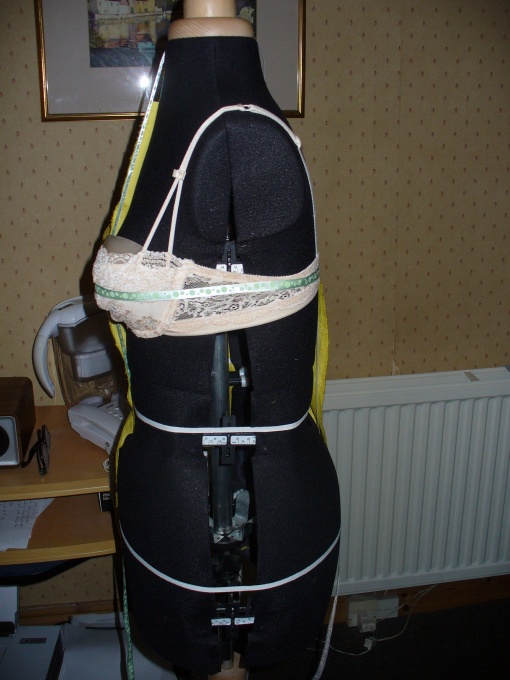
I had a few false starts (wonky side seam, repinning darts etc), but I think it is now looking at least respectable. It really helped to use a cotton lawn with pinstripe to keep me on the straight and narrow. I could see through it a little bit, which was very handy when drawing on the waist and bust line.

Here is the slightly meandering process from finish to start. I just need to sew it together!:


the side finished

the side finished

the front, finished

the front, finished

the back finished

the back finished

bust, waist and hip line marked out

bust, waist and hip line marked out

4: pinning the side seam straight

4: pinning the side seam straight

3: tidying up the sides

3: tidying up the sides

2: pinning the selvage to the back centre

2: pinning the selvage to the back centre

the start, pinning the front selvage to the front centre

the start, pinning the front selvage to the front centre

so sew tired……

slowly making my way to the finish line...

slowly making my way to the finish line…

My house has been one large container of thread scraps, paper strips and folders scattered everywhere. My weekend, and every evening for last week and a bit has been a blur of fashion pictures, coursework text and frantically trying to piece everything together to hand in today. Because the verifier needs to see it all and this evening was the deadline.

Unsurprisingly,  given how much I needed to do, there’s still some stuff outstanding. The good news is I can go and collect what I’ve handed in on Wednesday and crack on with the rest of it to return next Monday when the course officially ends. So, still to do:


Draping on the stand

Fitted dress pattern block and toile

Research two fashion designers (Christian Lacroix and Yamamoto)

Try and locate a sample I have made, but can no longer find

Hem the dress (will try very hard not to think of how long that is going to take!)

Finish writing an evaluation


Then I am officially having a dressmaking siesta, I need at least a week to recover and regain some sewing mojo as I feel like I have been cramming things a bit too much of late for my own enjoyment. Fear not, there are plenty of projects to do which will wait patiently for my return……

the final steps and stitches to the finish (hem) line

So, the dress (after a couple of until midnight evenings) has just about been finished, bar the hemming, This monster of a job, which will require roughly 4  meters of horsehair braid is going to be A Job. One which I am saving until later, when I have a lot more of the rest of my coursework finished. This all has to be handed in on Monday. I have a fair bit still to complete. This post is supposed to be about what I have accomplished so I wont dwell too much on that.

I am feeling pretty chuffed at how this dress now looks. Despite the list of “things to improve” from my dress making tutor I have still managed to retain some of the original enthusiasm from when I first started this project. Its come a long way from my quarter scale sample. It looks like what I imagined it to be and I have really pushed myself in the making of it.

There have been a few disasters along the way. Fabric dyeing and fabric stretching have been two big learning curves. I don’t think I will be in a hurry to make something like this again for a little while, but at least its now the right weather to wear it once it is finished.

So, here are the photos…..

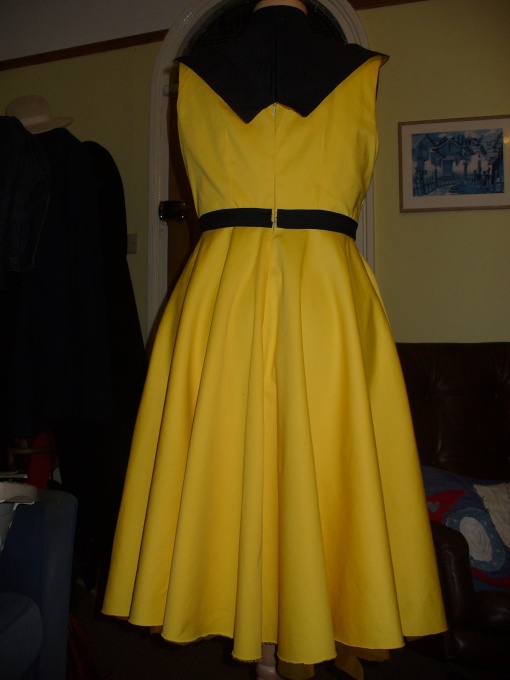
the back skirt is fabulously full

the back skirt is fabulously full

I like the slimming effect of the waist band

I like the slimming effect of the waist band

now with buttons!

now with buttons!

in the footsteps of the sewing frog

You may wonder what kind of creature the sewing frog is. You will soon know when you spot one. Or should I say hear one. Instead of ribbit, ribbit, you hear rip it rip it. Today I wandered far and wide forever hearing its call. My nice simple circle skirt pieces for the back had worked perfectly when I attached the silk organza interlining using the couture finishing technique I had read about where you add 1.5cm to interlining seams and flip it over, finishing the raw edges on both fabrics.

I think a combination of this technique not working well on curved seams and the front patterns pieces being cut more on the bias, plus working with an elastic cotton meant I tried forever and a day to get the two fabrics to line up. In the end I gave up and trimmed off the 1.5 cm from the organza and treated it as a normal seam. I am going to use a hong kong finish instead using leftover collar fabric for a nice bold contrast.

The good news is that I now actually have a dress. It needs to hang before I can hem it (in case it drops) and I need to finish off the inside seams, attach the bodice lining at the waist and add the mock waist band. Then (hooray!!) it will be done.

Time to get some well earned rest…

P1040356

P1040357

P1040358

another £12 worth of fabric. If only I had know how much time I would spend over this fabric today!

another £12 worth of silk organza fabric. If only I had known in advance how much time I would spend over this fabric today!

5, 4, 3, 2, 1…….

At some point during today it occurred to me that its a good job my dress design didn’t include more pattern pieces. Thanks to my decision to interline the whole thing in organza, and line the bodice I’ve ended up with 20 pieces to work with. No wonder its taken me a while to actually get started on sewing the whole thing together.

Fortunately (hooray!) there are only 5 pieces left to add, the remainder have all slotted together with varying levels of ease. Some stitch ripping, scissor work and stabbing of pins (both in the fabric and me) it is, I am very happy to report, looking pretty good. Of course, the side seams still need to be sewn together so a true fit is still to be checked.

A quick run down of the last 48 hours:

  • basted all the organza and fashion fabric pieces together. Discovered silk organza is a sly customer and that I’d have to buy some more and recut two pieces as they (despite carefully pinning) had shifted about too much
  • sewed all of the back together
  • added zip
  • added organza selvages to waist on all sections
  • added collar
  • added all of bodice lining

Which leaves a much more shorter list:

  • dye and recut 2 pieces or organza and attach to the two front skirt pieces
  • attach skirt pieces to bodice and sew up the side seams
  • attach the mock waist band and buttons
  • hem with synthetic horsehair
the back

the back,  just spotted a section of zip at the waist which needs tightening up. Grrr

the front, minus front skirt

the front, minus front skirtP1040352

another mini sample faced off

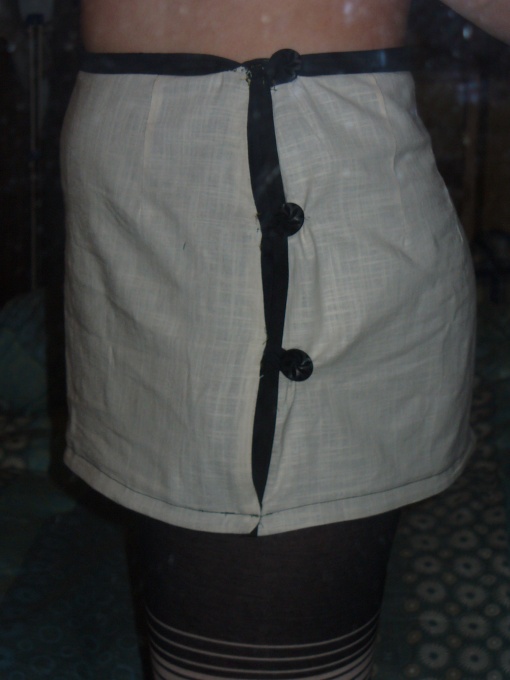
This mini took a little longer than planned. Instead of just sticking to the relatively simple idea of a wrap skirt with facing and rouleau loops I decided to also try and incorporate a couture interlining technique I had read about to finish the top edge. I discovered the hard way this technique (add 1.5cm to the interlining, or in my case facing, sew seam and flip interlining/facing over really does not work well on corners.

Some seam ripping and redesigning to compensate for the mess I made has resulted in a usable design. If you want beach wear in terms of skirt. Otherwise this will, as planned, be kept for sampled purposes. Having said that, I think it is a fun design. Of course – sample or not – I had to pair it with some fun tights.

the side, showing off the black placket

the side, showing off the black placket

the front

the front

inside out, to show facing, placket and roulou loop closures and faced hem. All in black for contrast effect.

inside out, to show facing, placket and rouleau loop closures and faced hem. All in black for contrast effect.


toile 1 finished toil 2 about to start

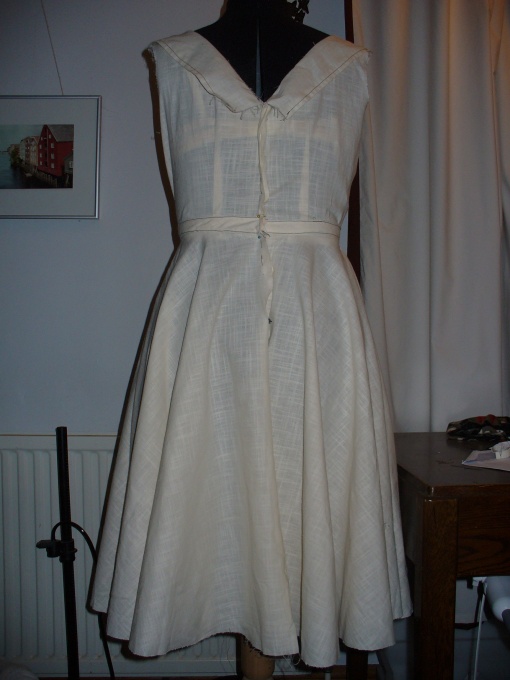
So, my long running dress toile is FINALLY finished. The main issue was the grain on the right side of the asymmetric front of the skirt. It just wouldn’t hang right. Three pieces later (good job I got 8 meters of muslin fabric near the start of the course) it is finally doing what it should. The mock waist band is firmly attached, and its on to the real thing.

Nearly all the pattern pieces (fashion fabric, organza and lining) have been cut out – just two more pieces to cut. I am hoping this will be a straightforward (and straight grained) sewing experience. It better be, as the course hand in deadline is the 15th of July. Apart from this dress, there are more than a few things to do. I think the remainder of my evening and weekend time until then is pretty much fully booked….

Fingers crossed.

front - I think given my pressing attempts on this the real thing is going to need a Pressing to Death experience to get everything looking good

front – I think given my pressing attempts on this the real thing is going to need a Pressing to Death experience to get everything hanging well 

the back

the back – still need to decide on how I want the ends of the collar to finish